Mailbox Post: Smart Installation Tips, Best Materials, and Stylish Design Ideas
Discover how to choose, install, and maintain a durable mailbox post that combines roadside safety, reliable mail delivery, and attractive curb appeal.

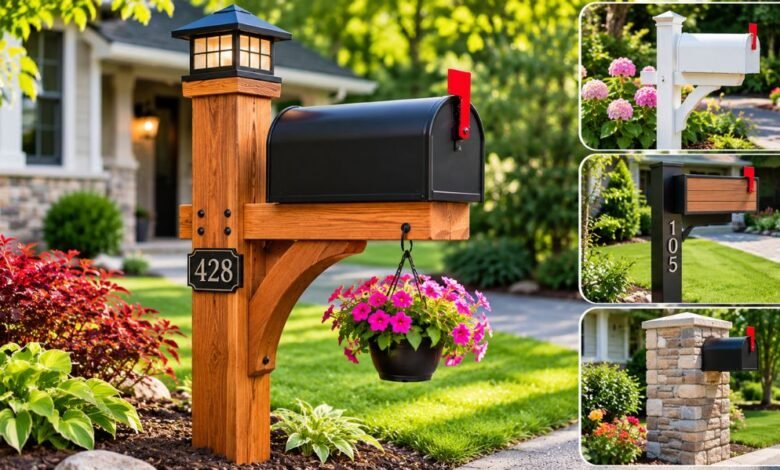
A Mailbox Post may seem like a small outdoor feature, but it plays an essential role in keeping your mailbox secure, accessible, and properly positioned. The right support can withstand everyday weather, complement your home’s exterior, and make mail delivery more convenient. Choosing one involves more than finding an attractive design.
Material strength, installation depth, roadside safety, and maintenance all deserve attention. From traditional wooden posts to modern metal and composite options, homeowners have several practical choices. Understanding their differences helps prevent common installation mistakes and supports a longer-lasting mailbox setup.
This article explains mailbox post materials, installation guidelines, design considerations, maintenance techniques, and practical solutions for common problems.
What Is a Mailbox Post?
A mailbox post is a support structure that holds a curbside mailbox at the right height and location. It usually consists of a vertical post, mounting bracket, and hardware that connects the mailbox securely to its support.
Mailbox posts serve three primary purposes: providing stability, allowing convenient mail delivery, and enhancing the appearance of a property’s entrance.
A properly installed support must remain stable during ordinary use while meeting applicable postal and roadside safety requirements.
Popular Mailbox Post Materials and Their Benefits
Different materials offer distinct advantages in durability, appearance, and maintenance.
Wooden Mailbox Posts
Wood remains a popular choice for its traditional look and versatility. Outdoor installations often use pressure-treated lumber rated for ground contact.
You can paint or stain wood to match a house’s exterior. However, it requires periodic inspection for moisture damage, cracking, and decay.
Metal Mailbox Posts
Steel and aluminum supports provide a clean, contemporary appearance. Aluminum resists rust, while steel generally requires protective finishes to limit corrosion.
For roadside installations, the support’s dimensions and ability to yield during a collision matter more than decorative strength alone.
Vinyl and Composite Mailbox Posts
Vinyl and composite products appeal to homeowners seeking relatively low-maintenance finishes. Many resist moisture and do not require the same painting schedule as natural wood.
Some decorative systems use an internal structural support. Buyers should check how that support is anchored and whether the complete assembly is appropriate for roadside use.
How to Choose the Right Mailbox Post
The best choice depends on the installation location, mailbox weight, local conditions, and the property’s architectural style.
For a traditional home, a simple wooden support can create a familiar appearance. Contemporary properties may benefit from a restrained aluminum design.
Before purchasing, consider:
- Material durability: Select a product suited to outdoor exposure.
- Mailbox compatibility: Confirm that the mounting bracket fits the mailbox.
- Roadside safety: Choose a suitable yielding or breakaway support.
- Weather resistance: Consider local rainfall, wind, and temperature changes.
- Maintenance needs: Account for cleaning, refinishing, and replacement parts.
A decorative post should never compromise the mailbox’s safety or accessibility.
Mailbox Post Installation: Essential Measurements and Safety Rules
Correct placement matters, especially for curbside mail delivery.
According to U.S. Postal Service guidance, a typical curbside mailbox should follow these measurements:
Installation Requirement: USPS Guidance
Mailbox height 41–45 inches above the road surface
Distance from curb 6–8 inches to the mailbox door
Recommended wooden support 4 × 4 inches
Recommended metal support 2-inch-diameter standard steel or aluminum pipe
Post burial depth No more than 24 inches
The height measurement applies to the bottom of the mailbox or the designated mail-entry point, as applicable.
Local road conditions can affect placement. Homeowners should consult their local post office before installing or relocating a curbside mailbox.
Preparing the Installation Area
Begin by identifying the approved location. Check for underground utilities before digging. In the United States, contact the 811 utility-notification service and follow local requirements.
Gather the necessary tools, which may include a measuring tape, post-hole digger, spirit level, gravel, mounting hardware, and suitable hand tools.
Installing the Support
- Mark the approved installation position.
- Dig the hole to the appropriate depth without exceeding applicable roadside guidance.
- Position the post vertically using a level.
- Backfill using an installation method suitable for the approved support system.
- Secure the mailbox with compatible brackets and fasteners.
- Measure the final mailbox height and setback.
- Check that the mailbox door opens freely.
Avoid installing rigid concrete columns or heavy, unyielding roadside supports. A support that can bend or break away when struck is safer than one designed to remain completely rigid.
Attractive Mailbox Post Design Ideas
A mailbox post can boost curb appeal without an elaborate design.
Traditional countryside style: A painted wooden post with a simple horizontal mounting arm creates a classic residential appearance.
Modern minimalist design: A streamlined metal support with a neutral finish works well with contemporary architecture.
Coordinated exterior finish: Matching the post color to exterior trim, fencing, or the front door helps create a consistent appearance.
Simple landscaping: Low-growing plants or neatly maintained ground cover can improve the surrounding area, as long as they don’t obstruct mail delivery or visibility.
Decorative features should not create sharp projections, obstruct the mailbox door, or make the roadside structure dangerously rigid.
Common Mailbox Post Problems and How to Fix Them
Even quality installations can develop issues through weather exposure and regular use.
Leaning Post
A leaning support may indicate loose soil, ground movement, or deterioration below the surface. Inspect the foundation and replace damaged components instead of forcing the post upright.
Wood Rot
Moisture can gradually weaken wooden posts. Check for soft areas, splitting, and decay, particularly near ground level. Severely damaged supports should be replaced.
Rust and Corrosion
Metal components may develop corrosion when protective coatings deteriorate. Remove minor surface rust where appropriate and apply a compatible protective finish.
Loose Mailbox
Inspect mounting screws, bolts, and brackets. Tighten loose hardware and replace damaged fasteners. The mailbox should remain secure without relying on a hazardous rigid roadside structure.
Simple Maintenance Tips for Long-Term Durability
Regular maintenance helps preserve both functionality and appearance.
Inspect the mailbox support after severe weather and during routine outdoor maintenance. Look for movement, cracks, corrosion, loose brackets, and visible damage.
Clean painted or composite surfaces with suitable mild cleaning products, and refinish wooden posts when their protective coating begins to deteriorate.
Keep vegetation trimmed around the mailbox and ensure that delivery vehicles can approach safely.
In snowy regions, remove accumulated snow when necessary and consider whether an approved extended-arm arrangement would reduce interference from roadside snow removal.
A few basic checks can identify problems before they require a complete replacement.
Conclusion: Choosing a Reliable Mailbox Post
A well-chosen Mailbox Post combines practical performance with an attractive exterior appearance. Material quality, correct placement, secure mounting, and routine maintenance all contribute to a dependable installation.
Wood offers traditional charm, metal provides modern styling, and composite products can reduce some maintenance needs. Regardless of appearance, roadside safety and postal accessibility should guide the final decision.
By following appropriate installation guidelines and caring for the structure over time, homeowners can create a mailbox setup that remains functional, visually appealing, and convenient for everyday mail delivery.
(FAQs)
1. What is the best material for a mailbox post?
Pressure-treated wood, aluminum, and suitable steel supports are common choices. The best option depends on climate, maintenance preferences, mounting compatibility, and roadside safety requirements. A compliant 4 × 4-inch wooden support is a practical traditional option.
2. How deep should a mailbox post be installed?
For U.S. curbside installations, USPS guidance recommends burying a suitable support no more than 24 inches deep. Follow the approved installation design and consult the local post office when conditions are unusual.
3. Can I install a mailbox post myself?
Yes, many homeowners can install a standard mailbox post using basic tools. However, the location should be confirmed with the postal service, underground utilities must be identified, and the finished installation must satisfy applicable requirements.
4. Should a mailbox post be set in concrete?
A rigid concrete installation is not automatically appropriate for a roadside mailbox. USPS recommends supports that bend or fall away when struck by a vehicle. Use an approved roadside mounting arrangement rather than assuming a heavy concrete foundation is safer.
5. How can I make my mailbox post last longer?
Choose weather-resistant materials, use compatible mounting hardware, maintain protective finishes, and inspect the support regularly. Addressing rot, corrosion, loose connections, and ground movement early can extend its useful life.